
Creating a rustic aesthetic in your home can bring a sense of warmth and charm that modern, minimalist designs may not always provide. One of the most versatile ways to add this rustic touch is by learning how to make a rustic floating shelf. These shelves not only provide functional storage space but also serve as an eye-catching decorative element, perfect for displaying books, plants, or vintage decor. In this comprehensive guide, we'll walk you through the steps on how to make a rustic wall-hung shelf, ensuring that the process is straightforward and achievable for any DIY enthusiast.


By using reclaimed wood or barn wood, you can achieve the authentic rustic look you're aiming for, while also being eco-conscious. If you're unsure of where to find reclaimed wood, consider checking local salvage yards, lumberyards, or even old furniture that can be repurposed.
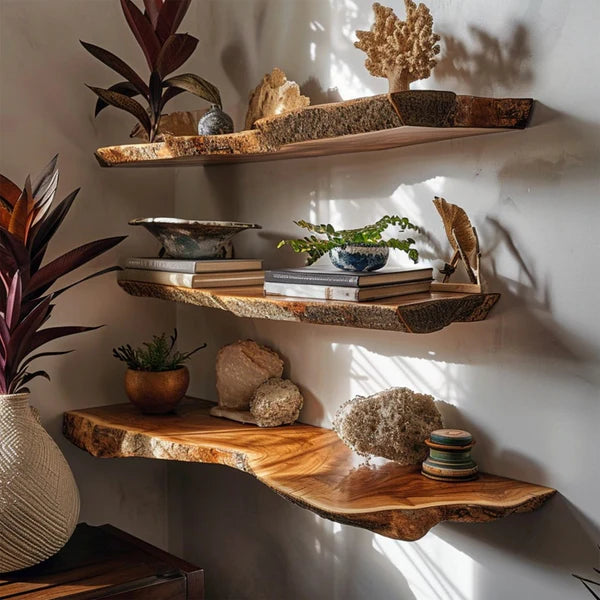
 Buy now: Live Edge Floating Shelf Wall Mount
If you're going for an authentic rustic look, reclaimed wood is ideal. It already has a worn, aged appearance that lends itself perfectly to the design. Once you’ve chosen your wood, measure and mark the desired length of the shelf. Most floating shelves range from 24 to 48 inches in length, but this can vary depending on the space available.
Use a saw to cut the wood to the correct size if needed, and sand down the edges with coarse sandpaper to smooth out any roughness while maintaining the natural texture.
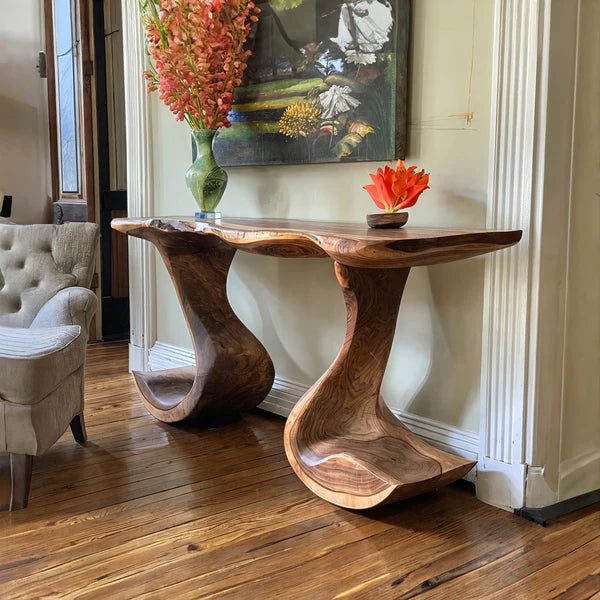
 Buy now: Floating Wall Shelf Custom Floating Shelf
Focus on maintaining the wood’s natural grain and texture—this is what gives rustic shelves their unique charm. You can sand more aggressively in areas that need a cleaner look, or keep certain imperfections for a more rugged appearance.

Once the stain has dried (follow the manufacturer's instructions for drying times), apply a clear sealant or varnish to protect the wood from moisture and wear. This is especially important if the shelf will be in a high-traffic area, such as a kitchen or bathroom. Sealing the wood will also make it easier to clean while preserving the rustic charm.
If you're looking for a more raw, untreated look, you can skip this step altogether. Just keep in mind that unsealed wood may be more susceptible to damage over time.

It’s important to plan the placement of your shelf based on what you plan to display or store on it. For heavier items, such as books or plants, make sure the shelf is anchored into wall studs for added support.
If you're using brackets, position them along the stud lines. For a cleaner, more minimal look, you can use hidden brackets designed specifically for floating shelves.

If you're working with heavier wood, such as reclaimed barn wood, make sure you use heavy-duty brackets that can support the weight. Once the brackets are firmly secured, slide your rustic shelf onto the brackets and check to ensure it’s level.


Tools and Materials You’ll Need to Make a Rustic Floating Shelf
Before you get started on your project, it’s essential to gather the right materials and tools. Crafting a rustic floating shelf requires only a few basic tools, and the materials can easily be found at your local hardware or lumber store.1. Materials
- Reclaimed wood or barn wood (choose a piece with visible grain and natural imperfections for a rustic look)
- Wall-hung shelf brackets or mounting hardware
- Wood screws and wall anchors (if needed)
- Sandpaper (coarse and fine-grit)
- Wood stain or finish (optional)
- Clear sealant or varnish (optional)
2. Tools
- Tape measure
- Level
- Drill with appropriate bits
- Screwdriver
- Stud finder
- Saw (if you need to cut the wood to size)
- Pencil for marking
By using reclaimed wood or barn wood, you can achieve the authentic rustic look you're aiming for, while also being eco-conscious. If you're unsure of where to find reclaimed wood, consider checking local salvage yards, lumberyards, or even old furniture that can be repurposed.
Step-by-Step Guide on How to Make a Rustic Floating Shelf
Now that you have all your tools and materials ready, let’s dive into the steps on how to make a rustic floating shelf. Follow this detailed guide to create a stunning and functional shelf for your home.1. Select the Perfect Piece of Wood
The first step in crafting a rustic wall-hung shelf is selecting the right piece of wood. Rustic shelves are all about embracing natural imperfections, so you’ll want to choose wood that has character. Look for pieces that have visible grain, knots, or even small cracks. These features add to the rustic aesthetic.If you're going for an authentic rustic look, reclaimed wood is ideal. It already has a worn, aged appearance that lends itself perfectly to the design. Once you’ve chosen your wood, measure and mark the desired length of the shelf. Most floating shelves range from 24 to 48 inches in length, but this can vary depending on the space available.
Use a saw to cut the wood to the correct size if needed, and sand down the edges with coarse sandpaper to smooth out any roughness while maintaining the natural texture.
2. Sanding the Wood for a Smooth Finish
Once your wood is cut to size, you’ll want to sand the entire surface, especially the edges, to remove any sharp or uneven areas. While rustic shelves are meant to have a raw, natural appearance, it's essential to sand the wood just enough to avoid splinters. Use coarse sandpaper (around 80 grit) to start, and then follow up with finer sandpaper (150 to 220 grit) for a smoother finish.Focus on maintaining the wood’s natural grain and texture—this is what gives rustic shelves their unique charm. You can sand more aggressively in areas that need a cleaner look, or keep certain imperfections for a more rugged appearance.
3. Staining or Sealing the Wood (Optional)
If you want to enhance the wood’s natural color or add a protective finish, now is the time to apply wood stain or sealant. Staining the wood can deepen its color, adding richness and contrast to the grain. You can choose a light stain for a natural finish or go darker for a more dramatic effect. Rustic finishes typically lean towards earth tones, such as walnut, oak, or chestnut.Once the stain has dried (follow the manufacturer's instructions for drying times), apply a clear sealant or varnish to protect the wood from moisture and wear. This is especially important if the shelf will be in a high-traffic area, such as a kitchen or bathroom. Sealing the wood will also make it easier to clean while preserving the rustic charm.
If you're looking for a more raw, untreated look, you can skip this step altogether. Just keep in mind that unsealed wood may be more susceptible to damage over time.
How to Attach a Floating Shelf for a Secure Installation
Now that you’ve made your rustic floating shelf, it’s time to move on to how to fit a floating shelf. A secure and level installation is crucial to ensure that your shelf not only looks great but also holds up over time. Follow these steps to ensure a successful installation.1. Measure and Mark the Placement
Before drilling any holes, measure the area where you want to install the shelf and mark the placement with a pencil. Use a level to ensure that your shelf will be straight. Mark where the brackets will be attached to the wall, making sure they’re evenly spaced along the back of the shelf.It’s important to plan the placement of your shelf based on what you plan to display or store on it. For heavier items, such as books or plants, make sure the shelf is anchored into wall studs for added support.
2. Locate the Wall Studs
For the best support, it’s essential to drill into wall studs when mounting your wall-hung shelf. Use a stud finder to locate the studs behind the wall, and mark their locations. If the studs don’t align perfectly with where you want your shelf to go, you’ll need to use wall anchors to ensure the shelf stays secure.If you're using brackets, position them along the stud lines. For a cleaner, more minimal look, you can use hidden brackets designed specifically for floating shelves.
3. Drill the Holes and Install the Brackets
With your markings in place and the studs located, it’s time to drill the holes. If you’re drilling into drywall, use wall anchors to provide extra stability. Once the anchors are in place, attach the brackets securely using the screws provided with your wall-hung shelf kit.If you're working with heavier wood, such as reclaimed barn wood, make sure you use heavy-duty brackets that can support the weight. Once the brackets are firmly secured, slide your rustic shelf onto the brackets and check to ensure it’s level.
4. Final Touches and Decorating
Once your shelf is installed, give it a final check to ensure it’s level and securely mounted. Now comes the fun part—decorating! Rustic floating shelves look great when styled with a mix of textures and natural elements. Try adding plants, ceramic pieces, vintage books, or framed photos to complete the look.Why SpryInterior is the Best Choice for Rustic Floating Shelves
When creating or purchasing ustic floating shelves, quality craftsmanship is essential. SpryInterior is a brand known for its high-quality, handcrafted furniture and home decor items. Here are just a few reasons why you should choose SpryInterior for your rustic wall-hung shelf needs:1. Sustainable and Eco-Friendly Materials
For environmentally conscious consumers, SpryInterior sources eco-friendly materials, including reclaimed and sustainable wood. This not only contributes to environmental conservation but also gives your home a unique, rustic feel that’s full of character.2. Handcrafted with Care and Precision
We take pride in its handcrafted products, ensuring that each piece is made with attention to detail and precision. Their rustic floating shelves are made from high-quality materials, giving you a shelf that is not only beautiful but also built to last.3. Timeless, Rustic Appeal
We specialize in rustic and timeless furniture designs, meaning their shelves will never go out of style. Their use of reclaimed wood and natural finishes ensures that your shelf will remain a statement piece in your home for years to come.4. Customizable Designs
If you have specific dimensions or finishes in mind for your floating shelf, we offer customizable options. You can work with their team to create the perfect shelf for your space, whether you need a specific length, depth, or finish to match your decor.
Leave a comment
This site is protected by hCaptcha and the hCaptcha Privacy Policy and Terms of Service apply.