Creating your own easy DIY entryway table can be a rewarding and enjoyable experience. It allows you to design a piece of furniture that perfectly fits your space and customize it to match your home decor. Whether you're an experienced DIY enthusiast or a beginner trying your hand at a new project, building an entryway table from scratch is simpler than you might expect. This comprehensive guide will walk you through the entire process, from gathering materials to adding the final decorative touches, ensuring that your DIY table is both stylish and functional.
Planning Your DIY Entryway Table: Measurements, Materials, and Design
The first step in building your entryway table is proper planning. This includes determining the right measurements for your space, choosing materials that match your design preferences, and deciding on the overall look you want to achieve.
Measuring the Space for Your Entryway Table
Before gathering materials, measure your entryway space to ensure the table fits proportionally. Entryways vary in size, so measure the length, width, and height to avoid a table that's too large or small. A typical entryway table is 30-34 inches tall, but the width should complement the space—narrow tables work best in small areas, while wider tables suit larger foyers. Leave enough room for comfortable movement, especially in high-traffic areas.

Choosing the Right Materials
Choosing the right materials is key to building a sturdy, attractive entryway table. Wood is a popular option for its versatility and durability. For a rustic look, solid hardwoods like oak or maple work well, while plywood or pine suits modern styles and is more affordable. You'll need screws, wood glue, sandpaper, a saw, and wood stain or paint for finishing, plus a clear sealant for protection. Consider pre-cut wood if you're new to DIY projects for ease and precision.
Designing Your Table: Aesthetic and Functionality
When designing your entryway table, it’s important to strike a balance between aesthetics and functionality. Consider the style of your home decor—whether it’s modern, farmhouse, industrial, or eclectic—and choose a design that complements it. Some popular designs for entryway tables include:
- Simple and minimalist entryway table: Clean lines, a slim profile, and neutral colors for a contemporary look.
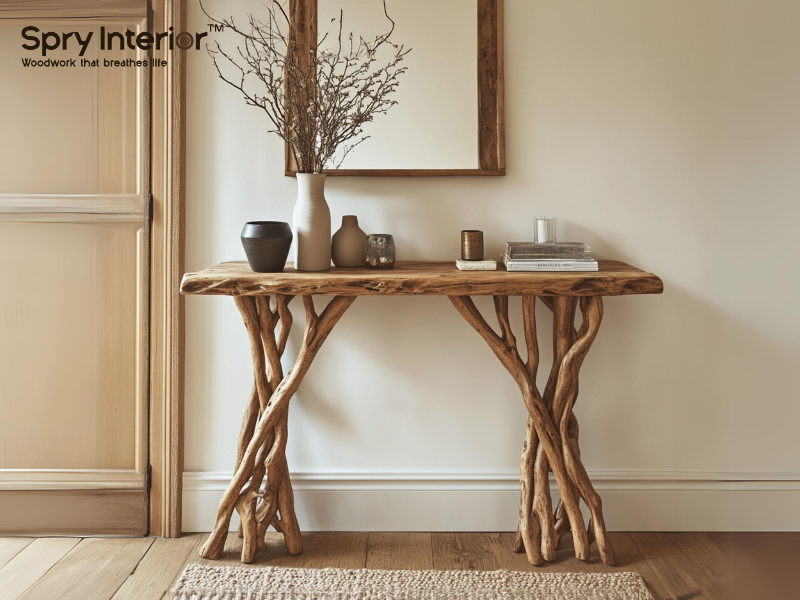
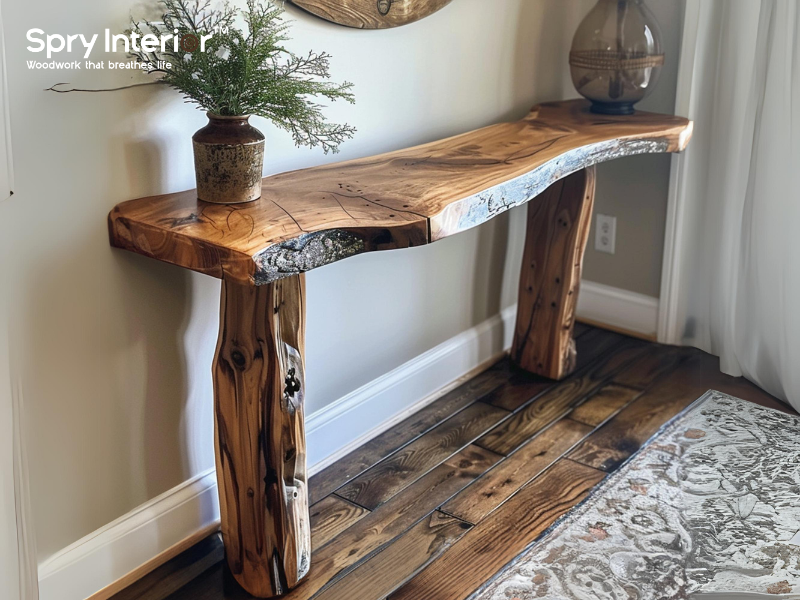
- Farmhouse rustic entryway table: Weathered wood, chunky legs, and a distressed finish for a cozy, lived-in vibe.
- Mid-century modern entryway table: Tapered legs, a smooth finish, and a sleek, angular design for a retro feel.
Functionality should also be considered, especially if you plan to use the table for storage. Adding drawers or shelves can provide a convenient place to store keys, mail, or other small items. If you prefer a more open design, a lower shelf or open cubbies can offer space for decorative baskets, shoes, or plants.
Building the Base: Constructing the Legs and Frame
Once you’ve finalized your design and gathered the necessary materials, the next step is constructing the base of your entryway table. This includes building the legs and frame, which will provide the table with the stability it needs.
Assembling the Table Legs
Start by cutting the wood for your table legs to the desired height. You can choose between straight legs for a clean, modern look, or opt for turned legs if you’re going for a more traditional or ornate style. After cutting the legs to size, use sandpaper to smooth any rough edges, ensuring that the legs are even in height.

If you want additional stability, consider adding cross-braces between the legs, which can be attached using wood screws or dowels. Cross-braces can also serve as a decorative element, especially if they’re placed in an X-shape for a rustic or industrial look.
Constructing the Frame for the Tabletop
Next, you’ll need to construct the frame that supports the tabletop. This involves cutting pieces of wood to create a rectangular frame that fits the size of your tabletop. The frame will attach to the legs and provide the foundation for the table’s surface.

Use wood glue and screws to attach the frame pieces, making sure that all the corners are square and even. You can also reinforce the joints with metal brackets or dowels for extra stability. Once the frame is complete, attach it to the table legs, making sure that the legs are evenly spaced and securely fastened.
Sanding and Prepping the Frame

Before moving on to the tabletop, it’s important to sand the entire frame, including the legs and cross-braces, to ensure a smooth finish. Use medium-grit sandpaper to remove any rough spots or splinters, then follow up with fine-grit sandpaper for a polished surface. Sanding not only makes the table look more professional but also helps the stain or paint adhere more evenly.
After sanding, wipe down the frame with a damp cloth to remove any dust or debris. At this point, you can choose to stain or paint the legs and frame before attaching the tabletop, or you can wait until the entire table is assembled.
Crafting and Attaching the Tabletop
With the frame and legs complete, it’s time to focus on the tabletop—the centerpiece of your DIY entryway table. This is where your design choices come to life, as the tabletop can be customized to fit the aesthetic you’re aiming for.

Selecting and Cutting the Wood for the Tabletop
The size and material of your tabletop will depend on the overall design of your console table ideas for entryway. If you’ve opted for a rustic or farmhouse style, wide planks of reclaimed wood can add character and charm. For a more modern look, a single slab of smooth, sanded wood may be more appropriate.
Cut the wood to the desired dimensions, making sure that it overhangs the frame slightly on all sides for a balanced look. If you’re using multiple planks of wood for a rustic effect, be sure to join the pieces securely using wood glue and clamps. Once the tabletop is cut and assembled, sand the surface until it’s smooth to the touch.
Attaching the Tabletop to the Frame
Once the tabletop is prepped and sanded, it's time to secure it to the frame. Center the tabletop carefully, ensuring it’s evenly spaced on all sides. Using wood screws, attach the tabletop from underneath, making sure the screws are evenly spaced for stability. Be cautious not to overtighten the screws to avoid splitting the wood.
For a more polished finish, wood filler can be used to cover the screw holes, followed by sanding once it’s dry. When thinking about what do you put on an entryway table, consider decorative items like vases, picture frames, or a stylish key tray to complement your design.
Finishing Touches: Staining, Painting, and Sealing
Once the table is assembled, apply your finish based on your design preference. Stain enhances the wood’s natural grain, adding warmth, while paint provides color or a modern finish. For stain, apply with a brush or cloth, following the grain, and let it dry before adding a second coat. For paint, use a primer and apply in thin layers. Finish with a clear polyurethane or wax sealant to protect the surface.
Styling Your DIY Entryway Table: Adding Decor and Personal Touches
With your DIY entryway table complete, the fun part begins—styling it with decor and personal touches that reflect your home’s personality.
Adding Decorative Trays and Bowls

One of the easiest ways to keep your entryway organized while still looking stylish is by incorporating decorative trays or bowls. These can hold keys, sunglasses, or loose change, ensuring that everything has its place. Choose trays or bowls that complement the style of your table, whether it’s rustic wood, sleek metal, or colorful ceramic.
Incorporating Plants and Flowers

Adding greenery to your entryway table brings life and color to the space. A small potted plant, a vase of fresh flowers, or even a faux plant can make a big impact. If your entryway receives natural light, consider low-maintenance plants like succulents or snake plants. For low-light spaces, opt for faux greenery that still adds a natural element.
Framing Artwork and Photos

Personalize your DIY entryway table by displaying framed photos or artwork that holds sentimental value. Lean the frames against the wall or hang them above the table for a layered, curated look. You can mix and match different frame sizes and finishes for added visual interest.
SpryInterior: Elevating Your DIY Projects with Quality and Style
SpryInterior is a brand dedicated to providing top-tier craftsmanship and innovative design solutions for homeowners and DIY enthusiasts. Whether you’re building a custom entryway table or looking for inspiration for your next project, SpryInterior offers products and services that blend functionality with aesthetic appeal. Here’s why SpryInterior should be your go-to choice for enhancing your home’s interior design.
Premium Quality Materials for Long-Lasting Durability
One of the standout features of SpryInterior is its commitment to using only the best materials. Every piece of furniture or decor item offered by SpryInterior is made from high-quality, eco-friendly materials. Whether it’s hardwood for your entryway table or sustainable finishes for your shelving units, SpryInterior ensures that their products are built to last. By investing in these materials, DIY enthusiasts can be confident that their creations will remain durable and stylish for years to come.
Unique and Customizable Designs
SpryInterior specializes in offering designs that stand out from the mass-produced furniture market. With customizable options, you can personalize your entryway table or any other project to match your unique style and home decor. From minimalist designs to bold, rustic pieces, SpryInterior’s furniture allows you to explore your creativity and build a space that truly reflects your personality. The ability to tailor every aspect of your project makes it easier for DIYers to achieve professional-level results with ease.
Support and Guidance for DIY Enthusiasts
SpryInterior isn’t just a furniture supplier—it’s a resource hub for DIYers. Whether you’re new to DIY projects or an experienced maker, SpryInterior offers tutorials, design inspiration, and expert advice to guide you through every step of your build. Their community-driven platform encourages users to share their projects, ask questions, and exchange tips, making SpryInterior the perfect partner for anyone looking to expand their DIY skills while maintaining a focus on quality and design.
Conclusion: Creating Your Entryway Table Made Easy
Building your DIY entryway table is a rewarding project that allows you to customize the piece to fit your specific needs and style. By following this step-by-step guide, you can create a beautiful and functional table that enhances the look of your home and serves as a practical space for storage and decor. Whether you’re a beginner or a seasoned DIYer, crafting your entryway table is a project that will leave you with a sense of accomplishment and a stunning piece of furniture for your home.



Leave a comment
This site is protected by hCaptcha and the hCaptcha Privacy Policy and Terms of Service apply.